Updated: November 22, 2026 · Features explained · By Kawya Aki
KwaiCut includes more than basic clip joining. Its feature set covers timeline editing, cropping, speed changes, reverse playback, subtitles, audio tools, filters, stickers, creative materials, and export options. This practical guide explains what each tool is designed to do, when it can improve a project, and what to check before publishing. It is written for creators who want to understand the tools—not simply tap effects at random.
At a glance: The official KwaiCut app listings describe precise video segmentation, cropping and splicing; reverse and speed controls; multiple export resolutions; audio noise reduction; music and sound effects; manual subtitles; adjustable filters; stickers and custom sticker import; and an Inspiration Center. Some tools or options may differ depending on your app version, device, and region.
Table of Contents
- How the tools fit together
- Segmentation, trimming, and splicing
- Crop, resize, and composition
- Speed and reverse
- Subtitles and text
- Music, effects, and noise reduction
- Filters and visual effects
- Stickers and custom imports
- Inspiration Center
- Export options
- Choosing the right tool
- Common feature problems
- Feature-testing exercise
- FAQs
How KwaiCut’s Editing Tools Fit Together
KwaiCut is a mobile video editor published by Kwai Technology Limited. Its official app listings describe a collection of editing capabilities that cover clip assembly, cropping, speed changes, reverse playback, audio, subtitles, filters, stickers, and export options. This guide looks at those tools individually and explains when each one is useful, what to check while using it, and how to combine features without making an edit feel overloaded. Feature availability and interface details can change between app versions, devices, and regions, so treat the options visible in your own installation as the final reference.
A useful way to understand an editor is to group its features by the job they perform. Timeline tools change the structure of the video. Framing tools control what appears inside the picture. Text and audio tools communicate information and atmosphere. Visual effects change the look or add decoration. Speed and reverse tools alter motion. Export settings determine how the finished project is rendered as a file. Thinking in these groups makes it easier to choose the right tool instead of tapping through every option.
1. Video Segmentation, Trimming, and Splicing
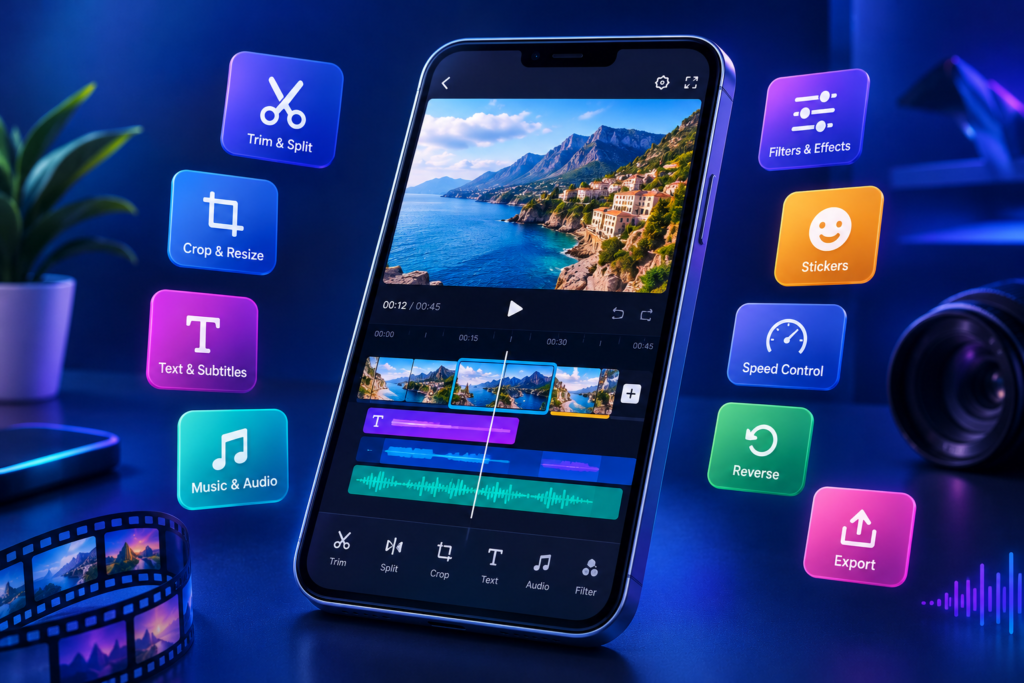
The foundation of most edits is the ability to divide footage into manageable pieces. The official KwaiCut listing describes precise video segmentation, cropping, and splicing. Segmentation or splitting separates a clip at a chosen point. Trimming shortens the visible start or end of a clip. Splicing joins selected sections into a continuous sequence. These actions are useful for removing pauses, mistakes, repeated movements, or sections that distract from the main idea.
Use splitting when you need to remove a section from the middle of a recording. Move the playhead to the intended cut point, apply the split command shown in your version, and inspect the two resulting pieces before deleting anything. Use trimming when the unwanted material is at the beginning or end. Splicing is useful when you have several short recordings that should play in a particular order.
A clean cut should preserve the meaning of the action. When editing speech, avoid cutting off the start or end of a word. When editing movement, try to cut at a natural moment rather than halfway through an important gesture. Listen across the edit as well as watching it: a picture may look smooth while the audio suddenly clicks, drops, or changes room tone. If a cut feels abrupt, try a slightly earlier or later point before adding a transition.
2. Crop, Resize, and Composition
Cropping controls which part of the original frame remains visible. It can remove empty space, bring attention to a subject, or adapt a landscape recording to a vertical layout. Resizing or changing the project frame is a separate decision from cropping: the frame determines the shape of the final video, while the crop determines how the source image fits inside that shape.
Before adjusting a clip, decide where it will be watched. A vertical frame is common for phone-first short videos, horizontal framing suits many widescreen presentations, and square framing can be useful in some feeds. Platform specifications can change, so check the current publishing requirements rather than assuming one size works everywhere. If a project contains several clips, review each one after changing the frame; the same crop may not suit every shot.
Keep the main subject inside a comfortable safe area. Leave space around faces, products, signs, and on-screen text so that platform buttons or captions do not cover them. If the source is horizontal and the final video is vertical, consider whether the subject can remain centred or whether a different shot would communicate the idea more clearly. Excessive zoom can soften the image because cropping does not create detail that was never recorded.
3. Playback Speed and Reverse
Speed adjustment changes how quickly a clip plays. Faster playback can shorten repetitive actions or create a time-lapse-like impression. Slower playback can highlight a movement, reveal a detail, or create a deliberate pause. Reverse playback presents the action in the opposite direction and can be used for a playful reveal or a visual effect. KwaiCut’s official app descriptions list speed adjustment and rewind/reverse capability, although exact controls may vary.
Choose speed based on the story rather than the novelty of the effect. A quick speed-up may help a long setup sequence move along, but speeding up a person’s speech can make it difficult to understand. Slow motion works best when the original footage contains enough frames and the movement is suitable for emphasis. Slowing a low-frame-rate clip too far may make motion look uneven; the editor cannot always invent the missing visual information.
Reverse effects need a little context. Water flowing backwards, an object returning to a hand, or a person retracing a movement can be visually interesting, but everyday actions may look confusing when reversed. Preview the whole reversed section and consider adding a short caption if viewers might misunderstand what they are seeing. Always check the audio after changing speed or direction, because the original sound may no longer suit the altered picture.
4. Manual Subtitles and Text Styling
Text is more than decoration: it can make a video understandable when sound is off, identify a topic, explain a step, or highlight a key point. The official KwaiCut listing describes manual subtitle adding and editing tools, along with a library of subtitle styles and dynamic effects. This makes text particularly useful for tutorials, demonstrations, short explainers, and videos watched in quiet environments.
For subtitles, divide speech into readable phrases rather than displaying a full paragraph at once. Keep each caption on screen long enough to read, and synchronise its appearance with the spoken words. Review names, numbers, punctuation, and technical terms manually. If your version offers an automatic or assisted caption feature, treat its output as a first draft: speech recognition can misinterpret accents, background noise, overlapping voices, and unfamiliar names.
For titles and labels, use a consistent typeface and a small number of sizes. High contrast helps text remain visible over different footage. Avoid placing important words at the extreme edges, where they may be clipped or covered by app controls on a social platform. If a title contains several lines, preview it on a phone-sized screen. A design that looks balanced on a large monitor may feel crowded on a mobile display.
Dynamic text effects can attract attention, but they should not distract from the information. Use motion for a short opening title or a key phrase, then keep ordinary captions calm and readable. If every word bounces, flashes, or changes colour, viewers may struggle to follow the message.
5. Music, Sound Effects, and Noise Reduction
Audio has at least two jobs: it carries information and it creates atmosphere. The official app listing describes a multi-style sound-effect library, music options, and audio noise reduction. These tools can help creators add a background track, emphasise an action, or make a voice recording easier to hear. The best result is usually not the loudest one; it is the mix in which the most important sound is clear.
When a video contains speech, make the voice the priority. Add background music quietly enough that every sentence remains understandable. Listen through headphones and through the device speaker if possible, because a mix that sounds balanced on one system may feel different on another. Watch for abrupt starts and stops, sudden jumps in volume, or music that masks a key sound.
Noise reduction may help with steady background noise, but strong processing can make speech sound thin, metallic, or unnatural. Compare the processed version with the original and use the least amount that produces a useful improvement. It is often better to record in a quieter room, move closer to the microphone, and avoid handling the phone while recording than to rely entirely on post-production.
Sound effects are most effective when they support an action or clarify a transition. A subtle tap, whoosh, or notification sound can help a viewer notice a change, but repeated effects can make a tutorial tiring. Check the licence for every music track and sound effect. Being available inside an editing app does not necessarily grant permission for every commercial use, territory, account type, or external platform.
6. Filters and Visual Effects
Filters adjust the overall appearance of a clip. They may change colour, contrast, warmth, or mood. KwaiCut’s official listing describes a collection of cinematic filters with adjustable intensity. The ability to adjust strength is important: a filter can be useful as a starting point without needing to be applied at full intensity.
Compare the filtered clip with the original before deciding. Check skin tones, bright areas, shadow detail, and colours that matter to the subject. If your video combines footage recorded at different times or in different lighting, one filter may not produce a consistent result across every shot. Apply adjustments thoughtfully and review the sequence as a whole, not just one attractive frame.
Visual effects can create emphasis or a particular atmosphere, but they should not hide important information. Avoid stacking several strong effects simply because they are available. If a product demonstration needs accurate colours, choose restrained adjustments. If the video is a creative montage, stronger stylisation may be appropriate, provided the footage remains clear and the effect supports the intended mood.
7. Stickers and Custom Sticker Imports
Stickers can add a visual cue, a label, a reaction, or a little personality. The official KwaiCut description lists static and animated sticker collections and says custom sticker import and management are supported. This can be useful when a creator wants to highlight a location, draw attention to a feature, or maintain a recognisable visual style across a series of clips.
Keep stickers away from faces, captions, product details, and other important areas. Scale them so they support the composition rather than dominating it. An animated sticker should not pull attention away from speech or movement that viewers need to understand. If you import your own sticker artwork, use files that you created or have permission to use, and check that the image has a clean background if transparency is required.
For a professional-looking result, use a small visual vocabulary. Repeating one or two related sticker styles can look intentional; mixing unrelated styles may make the video feel cluttered. Preview stickers against both light and dark scenes because an icon that is visible in one shot may disappear in another.
8. Inspiration Center and Ready-Made Materials
The Google Play listing describes an Inspiration Center and a material centre with creative resources. Such libraries can help when you need a starting point for a visual idea, a themed element, or a faster way to explore styles. Their contents may change over time and can vary by region or app release, so the materials visible in your installation are the best guide to current availability.
A ready-made material is a starting point, not a substitute for editorial judgement. Ask whether it suits the subject, tone, audience, and platform. A trend-based visual may look current today but feel dated later. For a business, educational, or portfolio video, a consistent custom style may be more useful than a rapidly changing template. Check any usage terms associated with downloaded materials, especially if you plan to use the final video commercially.
9. Export Resolution and Final Output
Exporting converts the edit into a finished video file. KwaiCut’s official listings say the app supports multiple high-definition export resolutions, but the available choices and labels may differ by device or version. Resolution describes the pixel dimensions of the frame. Frame rate describes how many frames are displayed each second. Bitrate affects how much data is used to encode the video and therefore influences file size and visual quality.
Choose export settings with the original recording and destination in mind. A higher resolution can create a larger file and take longer to process, but it cannot restore detail missing from a low-quality source. If the source is vertical, keep the final frame vertical unless you have a reason to change it. If a platform has its own recommended dimensions or limits, consult its current guidance before exporting.
After the export finishes, open the saved file outside the editor. Watch the beginning, middle, and end, and listen for missing audio. Check that the video has the intended orientation, that captions are not clipped, and that no blank frames or unexpected borders appear. If the export looks different from the preview, compare the source file, project frame, and export choices before repeating the entire edit.
10. How to Choose the Right Tool for the Job
A good editor does not use every feature in every project. For a simple talking-head video, the most valuable tools may be trimming, captions, light noise reduction, and a careful export. For a travel montage, crop, clip order, music, and restrained filters may matter more. For a product demonstration, accurate colour, readable labels, steady framing, and clear voice audio should take priority.
Use this quick decision process: first identify what is wrong or missing in the footage; next choose the smallest tool that can solve it; then preview the result in context. If a clip is too long, trim it. If the subject is poorly framed, crop or reposition it. If a viewer cannot follow the explanation without sound, add captions. If the voice is masked by steady background noise, test noise reduction. If the sequence feels slow, consider removing unnecessary footage before changing playback speed.
This approach keeps the video focused and reduces unnecessary processing. It also makes revisions easier because you know why each change was made. Save a clean version of the project before trying a more experimental treatment, especially when you are working on an important video.
11. Common Feature Problems and What to Check
If a speed change does not appear immediately in the preview, close the adjustment panel if needed and play the clip again; some interfaces update the preview only after confirming a setting. If a filter looks different on another clip, compare the original lighting and colours before assuming the tool is malfunctioning. If a sticker or text element is missing after export, check its timing and whether it extends across the part of the timeline you expect.
If audio becomes distorted after noise reduction, reduce or remove the processing and compare it with the original recording. If an export fails, note the error message, check available storage, and test a short section from a duplicate project. If a particular effect or clip appears to trigger the issue, remove it from the copy and test again. Avoid deleting the only copy of a project while troubleshooting.
App interfaces and software behaviour change with updates. Check the current official store listing and update notes before following an older screenshot tutorial. Install the app through an official app store or publisher source rather than a modified package from an unknown website. If a problem continues, use the app publisher’s support channel and include the app version, device model, and a clear description of the issue—never send passwords or verification codes.
12. A Practical Feature-Testing Exercise
Create a short practice project using a few clips that you are comfortable experimenting with. First, make a clean sequence using trim and split. Next, adjust the frame to suit the platform where you intend to share it. Add one title and a short caption. Place a quiet music track under the main audio, then compare the result with and without noise reduction if the recording contains background noise.
Try one filter at a reduced intensity and compare it with the original. Add one sticker only if it helps explain or emphasise something. Make a brief speed change on a section that does not contain important speech. Export a test copy and watch the saved file on your phone. Write down which changes improved the result and which ones were unnecessary. The goal is not to use every tool; it is to understand what each tool contributes.
How This Guide Relates to the Other KwaiCutGuide Categories
This article belongs to KwaiCut Features & Tools and focuses on what individual editing tools do and when to use them. If you need a start-to-finish lesson for your first project, visit the KwaiCut Tutorials category. If the app is slow, an export fails, or a particular feature behaves unexpectedly, visit KwaiCut Tips & Troubleshooting. Keeping these topics separate helps readers find a focused answer without repeating the same beginner introduction in every article.
Related KwaiCut Guides
Continue learning with these related guides from KwaiCutGuide:
- KwaiCut Video Editor: Complete Beginner’s Guide
- KwaiCut Subtitles and Text Styling
- Fix KwaiCut Export Problems
- Plan Better Videos Before Editing in KwaiCut
- KwaiCut for PC
Frequently Asked Questions About KwaiCut Features
Find quick, practical answers to common questions. If an option looks different in your app, check your installed version because features and interface labels can change.
What features does KwaiCut offer?
The official app listings describe video segmentation, cropping, splicing, reverse playback, speed adjustment, high-definition export options, audio noise reduction, music and sound effects, manual subtitles, subtitle styles, filters, stickers, custom sticker import, and an Inspiration Center. Availability may vary by version and device.
Does KwaiCut support custom stickers?
The official Google Play description says users can import and manage custom stickers. Check your installed version for the current import options and use artwork you own or are licensed to use.
Can I add subtitles manually in KwaiCut?
Yes. The official app listing describes manual subtitle adding and editing tools, along with subtitle styles and dynamic effects. Review every caption for wording, timing, and readability.
Can I adjust the strength of filters?
The official listing describes filters with adjustable intensity. If the control is available in your version, start with a subtle setting and compare the result with the original footage.
Does KwaiCut include audio noise reduction?
The Google Play listing describes audio noise reduction. Its effectiveness depends on the source recording; strong processing may affect voice quality, so compare before and after.
Can I reverse a video in KwaiCut?
The official listings describe rewind or reverse capability. The exact control may differ by version. Preview the reversed section and check whether its audio should be muted or replaced.
Does KwaiCut support high-resolution exports?
The official app descriptions say multiple high-definition export resolutions are supported. The actual options may depend on device, app version, and project. Larger resolutions can increase file size and processing time.
Why do my filters or effects look different after export?
Check the original clip, project frame, preview quality, export settings, and any compression applied by the platform where you share the video. Always inspect the saved file itself.
Are KwaiCut’s music and stickers free for commercial use?
Do not assume that availability inside the app grants unrestricted commercial rights. Check the relevant material licence, app terms, and platform rules before using third-party assets in commercial content.
Where can I check the latest KwaiCut features?
Use the current official Google Play or Apple App Store listing and the app’s own update information. Feature descriptions and availability can change over time.
Official App Information and Further Reading
For the publisher’s current feature description, check KwaiCut on Google Play and KwaiCut on the Apple App Store. The store listings are the best place to confirm current availability, supported devices, and update information.
Editorial note: KwaiCutGuide is an independent educational website. It is not affiliated with, endorsed by, or an official support channel for Kwai or KwaiCut. Product features and interface labels may change. Always check the app’s current version and applicable licences before publishing a video.
About the Author
Kawya Aki writes practical learning resources for KwaiCutGuide, focusing on mobile video editing tools, clear workflows, and useful troubleshooting. Each guide aims to help readers understand the purpose of an editing feature and use it thoughtfully.
3 thoughts on “KwaiCut Features and Tools Explained: Complete Guide”